Winterizing Salt Water Pool || As the cold weather approaches, it’s time to prepare your saltwater swimming pool for winter. Properly winterizing your saltwater pool will help protect it from potential damage and ensure a smooth reopening in the spring. In this comprehensive guide, we’ll walk you through the essential steps to winterize your saltwater pool effectively.
How to winterize a salt water pool
We’ve outlined the process through which one can winterize a salt water pool in these simple steps to help you avoid surface stains, algae growth, and costly pool damage.
Not putting any salt
With the onset of milder weather, water conductivity falls, which might lead a chlorine generator system to signal low salt levels. People observe this and inadvertently add extra salt to the pool, without even realizing that they are adding excess salt to the water. You can effectively use test strips to measure the amount of salt or a digital salinity tester for the most accurate salinity reading in cold conditions.
Always keep your salt levels within the range that the manufacturer suggests. It’s recommended to allow salt levels a touch towards the low end of the range when winterizing water pools with the help of salt, though. Avoid adding more salt to the pool in the weeks before shutting since it might react with impurities in the water and leave ugly pool stains.
Balancing the water
Check your water’s chemistry in other areas besides salinity by testing and balancing it. Make sure pH is between 7.2 and 7.8, total alkalinity is between 80 and 120 ppm, and calcium hardness is between 200 and 400 ppm a week before your closing date. When necessary, make adjustments and let the water flow. If the calcium, pH, and TA levels are out of whack, salt water can create mineral scale on the surface of the pool.
Maintaining these numbers within range is crucial since unbalanced water might reduce the efficiency of the winter chemicals. Maintaining a pH below 7.6 will aid in preventing scale formation if the calcium content is higher than 400 ppm.
Cleaning the pool

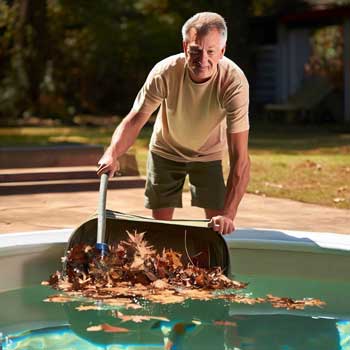
Get your pool clean before putting the cover on to avoid problems in the spring. Over the winter, a pool can become stained by debris such as leaves, dirt or organic matter left behind. To get rid of as much dirt as you can, thoroughly skim, then brush, and also vacuum the pool. Clean the skimmer as well. Run the filter for an extended period of time in the days preceding pool closing to make sure the water remains as sanitized as possible.
Shock the pool a few days prior to shutting to get rid of any leftover germs, algae spores, and organic materials that may be present in the water. The right quantity of granular shock will be included in a pre-sized pool closing package for your pool.
Remove equipment from the pool
Slides, diving boards, ladders, and railings need to be taken out of your saltwater swimming pool for the winter. (Some can be left in their current location if they are set back sufficiently to not obstruct the winter or safety cover.) Remove the deck mounting brackets if they are too close to the edge of the pool to avoid stressing your winter cover or safety cover. While you are in the midst of winterizing your pool salt water pool, take out all of the toys, floats, and pool cleaners as well.
Adding winter chemicals
Pool closing kits come in many different varieties. Truth be told, all winter kits are safe to use in salt water swimming pools, despite some of them being particularly marketed as “salt water closure kits.” Not only are pool closing kits very practical, but they’re also a cheap method to buy winterizing chemicals. High levels of chlorine can ruin a winter cover by dissolving algaecide. Before adding your final winter chemicals, make one more check of the chlorine levels and water balance. Chlorine levels ought to be back in the typical range of 1-3 ppm since the pool has recently been cleaned and shocked.
After the water level has been decreased and the pool’s equipment has been removed, winter algaecide is typically one of the last items applied before the pool is covered. The concentration of the algaecide is maintained by waiting until the end. Using a pool brush to stir the water will assist the algaecide spread through the water if you decide to add it later.
Lowering the water level
If your vinyl pool has a faceplate-style skimmer plug, you can skip this step. If this is the situation with your pool, move on to the following step without lowering the water level. If you have a D.E. or sand filter, begin this process by backwashing the filter to get rid of any dirt and debris inside and to begin the cleaning process.
Avoid letting the water level fall too far while backwashing. Avoid letting the pump run dry because the skimmer is empty because this could harm the pump! Submersible pumps, the main drain, or pool siphoning can all be used to complete the water lowering process.
Final words
Add some non-toxic antifreeze as an additional measure to guard against harm to your pool. Only those who live in really cold climates where the water is susceptible to freezing should do this. This is a great kind of protection in case the skimmer plug is harmed or if you’re not sure whether all the water has been forced out of the plumbing. Read More>>
Leave a Reply